.webp) |
| 10 Stunning Henna Flower Designs for Hands & Feet |
Have you ever wondered how to transform your hands and feet into living canvases of intricate botanical beauty? Henna, or mehendi, is more than just a beautiful body art; it's a centuries-old tradition brimming with cultural significance. And what could be more captivating than the delicate elegance of floral henna designs?
Whether you're preparing for a wedding celebration, a cultural festival, or simply want to express your creativity, flower henna designs offer the perfect blend of tradition and artistry. In this comprehensive guide, we'll walk you through 10 stunning henna flower designs for hands and feet, complete with step-by-step instructions that both beginners and experienced artists can follow.
From simple floral mehndi patterns to elaborate bridal henna creations, these designs will help you master the art of henna while embracing its rich heritage. Let's dive into these beautiful flower henna designs that will transform your hands and feet into blooming works of art!
1. The Classic Lotus Bloom
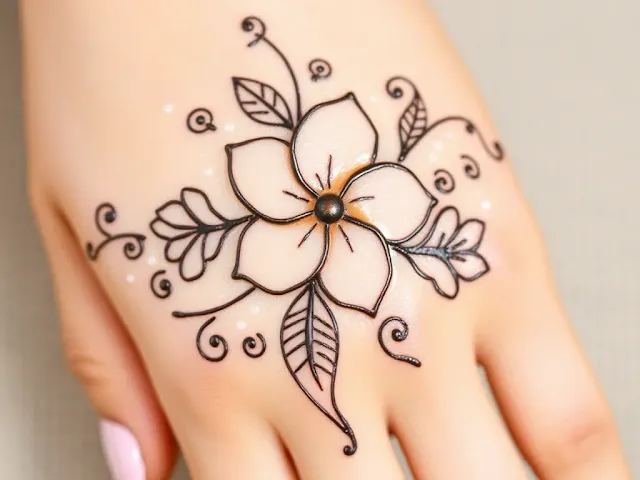
The lotus flower symbolizes purity and beauty in many cultures, making it a perfect choice for henna flower designs for hands.
Step-by-Step Instructions:
- Start with the center: Draw a small circle in the center of your palm or the back of your hand.
- Create the inner petals: Add 5-6 small, rounded petals around the center circle.
- Add outer petals: Draw a second layer of larger petals surrounding the first layer.
- Detail the petals: Add fine lines inside each petal, radiating from the center.
- Embellish with dots: Place tiny dots between petals and around the outer edge of the flower.
- Add leaves: Draw 2-3 slender leaves extending from the base of the flower.
- Finish with vines: Create delicate vines with small leaves branching out from the main design.
Pro Tip: For a more intricate lotus design, add small dots of henna inside each petal to create texture and dimension.
Variations: Try creating mini lotus flowers connected by swirling vines across your hand for a more elaborate design.
2. Delicate Daisy Chain
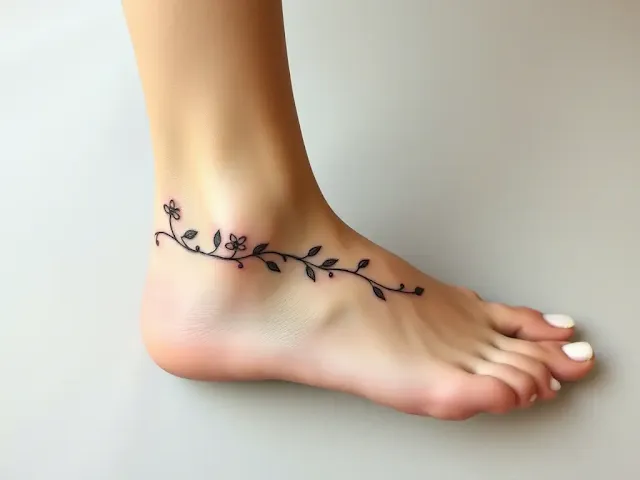
This simple floral mehndi design is perfect for beginners and creates a beautiful effect when wrapped around the ankle or across the top of the foot.
Step-by-Step Instructions:
- Draw the first flower: Create a small circle with 5-8 petals on the side of your foot.
- Connect with a stem: Draw a curved line extending from the first flower.
- Add the second flower: At the end of the stem, draw another daisy of similar size.
- Continue the chain: Repeat the process, connecting 3-5 flowers in a flowing line.
- Add leaves: Draw small leaves along the stem between flowers.
- Embellish with details: Add small dots and tiny curved lines around the flowers.
- Extend to ankle: If desired, continue the design up and around the ankle.
Pro Tip: Keep your daisy petals simple and evenly spaced for a clean, elegant look. This henna flower design for feet looks particularly beautiful when it follows the natural curve of your foot.
Variations: Mix flower sizes or add different flower types to create visual interest.
3. Romantic Rose Cascade
This stunning design features cascading roses with lush foliage—perfect for bridal henna or special occasions.
Step-by-Step Instructions:
- Create the main rose: Start with a spiral in the center of your hand or wrist, then add overlapping petals around it.
- Add rose buds: Draw smaller spiral buds near the main rose.
- Connect with flowing stems: Create curved stems connecting the roses.
- Add leaves: Draw teardrop-shaped leaves along the stems.
- Create thorns: Add small triangular thorns on the stems for authenticity.
- Embellish with tendrils: Draw small curling tendrils branching from the main stems.
- Fill empty spaces: Add small dots or tiny flowers in any empty spaces.
- Extend the design: Allow the design to flow naturally across your hand.
Pro Tip: Vary the size of your roses from fully bloomed to small buds to create a natural, romantic cascade effect.
Variations: For bridal henna, extend this design up the arm with increasingly detailed elements.
4. Sunflower Splendor
Bright and cheerful, this henna flower design for hands brings the joy of sunflowers to your skin art.
Step-by-Step Instructions:
- Draw the center: Create a large circle on the back of your hand.
- Fill the center: Add small dots or a cross-hatched pattern inside the circle.
- Create the petals: Draw evenly spaced, elongated petals around the center.
- Add definition: Draw a line down the middle of each petal.
- Create leaves: Add large, slightly jagged leaves extending from the base.
- Connect with stems: Draw thick stems connecting to the flower.
- Add details: Create small swirls and dots around the design.
Pro Tip: Make your sunflower stand out by adding shading to the center with closely placed dots.
Variations: Create a field of smaller sunflowers across your hand or combine with other wildflowers for a meadow-inspired design.
5. Elegant Jasmine Trail
This delicate design features tiny jasmine flowers trailing across your foot—perfect for a minimalist yet elegant look.
Step-by-Step Instructions:
- Start at the ankle: Begin with a small five-petaled flower at your ankle.
- Create the vine: Draw a flowing, curving line down toward your toes.
- Add flowers: Place small jasmine flowers (five simple petals) along the vine.
- Include buds: Add tiny oval-shaped buds between some flowers.
- Draw leaves: Create small, pointed leaves along the vine.
- Add details: Embellish with fine dots near the flowers.
- Extend to toes: Allow the design to branch delicately toward your toes.
Pro Tip: Keep jasmine flowers small and delicate for an authentic look. This simple floral mehndi design is perfect for everyday wear.
Variations: Add a small cluster of jasmine flowers at the center point of your foot for added emphasis.
6. Hibiscus Statement
Bold and tropical, this statement design centers around a large hibiscus flower.
Step-by-Step Instructions:
- Draw the outline: Create a large, five-petaled hibiscus shape on the back of your hand.
- Detail the petals: Add curves and indentations to the petal edges for realism.
- Create the stamen: Draw the distinctive long stamen in the center of the flower.
- Add inner details: Create fine lines inside each petal, radiating from the center.
- Draw leaves: Add several pointed, serrated leaves around the flower.
- Connect with swirls: Create flowing swirls extending from the main flower.
- Add smaller flowers: Draw tiny secondary flowers around the main hibiscus.
- Finish with dots: Embellish the design with carefully placed dots.
Pro Tip: For a more dramatic effect, make your hibiscus asymmetrical with petals of slightly different sizes.
Variations: Create a half-sleeve by extending this flower henna design up your arm.
7. Cherry Blossom Minimalist
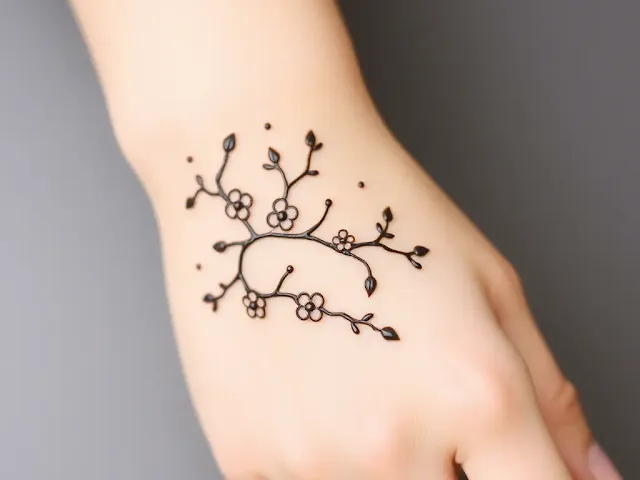
This delicate, minimalist design features dainty cherry blossoms—perfect for those who prefer subtle elegance.
Step-by-Step Instructions:
- Start with branches: Draw thin, branching lines across your fingers or wrist.
- Add flower bases: Create small circles at various points along the branches.
- Form the petals: Add five rounded petals around each circle.
- Create flower centers: Add tiny dots in the center of each flower.
- Add buds: Draw small oval buds on some branches.
- Include small leaves: Add occasional small pointed leaves along the branches.
- Embellish: Add tiny dots near the flowers for a delicate effect.
Pro Tip: Space your cherry blossoms unevenly along the branches for a more natural, flowing appearance.
Variations: Concentrate the blossoms at your fingertips, gradually spreading out toward your wrist.
8. Mandala Flower Fusion
This design combines geometric mandala patterns with floral elements for a stunning fusion style.
Step-by-Step Instructions:
- Create the center: Draw a circle in the center of your palm.
- Add geometric details: Fill the circle with a simple geometric pattern.
- Draw the first layer: Create a ring of petals around the center.
- Add the second layer: Draw a larger ring of more detailed petals.
- Create detail work: Add intricate patterns inside each petal.
- Connect with flourishes: Draw flowing lines extending from the main mandala.
- Add smaller flowers: Place smaller flowers along the extending lines.
- Finish with dots: Complete the design with strategically placed dots.
Pro Tip: Maintain symmetry in your mandala flower by working on opposite sides simultaneously.
Variations: For bridal henna, create multiple interconnected mandala flowers of varying sizes.
9. Paisley Flower Weave
This intricate design weaves traditional paisley patterns with flower elements across the top of the foot.
Step-by-Step Instructions:
- Start with the main flower: Create a medium-sized flower at the ankle or center of foot.
- Add paisley shapes: Draw curved paisley forms extending from the flower.
- Fill the paisley: Add intricate details inside each paisley shape.
- Connect with vines: Create flowing vines connecting the elements.
- Add smaller flowers: Place small flowers along the vines.
- Include leaves: Draw small leaves branching from the vines.
- Extend to toes: Allow delicate elements to flow toward the toes.
- Add final details: Complete with fine line work and dots.
Pro Tip: Create contrast by varying the density of details—some areas highly intricate, others more open and airy.
Variations: For a more dramatic henna flower design for feet, extend the pattern up the ankle and onto the leg.
10. Tropical Frangipani Fan
This exotic design features frangipani (plumeria) flowers arranged in a fan pattern across the hand.
Step-by-Step Instructions:
- Create the central flower: Draw a large five-petaled frangipani in the center of your hand.
- Add dimension: Create a small circle in the center of the flower and shade the base of each petal.
- Draw surrounding flowers: Add smaller frangipani flowers around the main one.
- Connect with curved lines: Create flowing lines connecting the flowers.
- Add leaves: Draw elongated, pointed leaves between the flowers.
- Embellish with swirls: Add delicate swirls extending from the design.
- Create border elements: Add small decorative elements along the edges.
- Fill with detail work: Complete with fine lines and dots for texture.
Pro Tip: For realistic frangipani flowers, make the petals slightly overlapping and add a gentle gradient effect with closely spaced lines.
Variations: Create a bracelet design around your wrist using a series of connected frangipani flowers.
Bringing Your Henna Flower Designs to Life
Now that you've discovered these 10 stunning henna flower designs for hands and feet, it's time to bring your creativity to life! Remember that practice makes perfect when it comes to mastering the art of applying henna. Start with simpler designs like the Daisy Chain or Cherry Blossom Minimalist before attempting more intricate patterns.
Each of these floral mehndi designs can be adapted to suit your style and skill level. Whether you're preparing for a wedding with elaborate bridal henna or looking for simple floral mehndi designs for everyday wear, these patterns provide the perfect foundation for your henna journey.
We'd love to see your creations! Share your henna flower designs on social media using #HennaFlowerDesigns and #MehndiArt. Have questions about any of these designs or tips for achieving the perfect henna stain? Leave us a comment below—we're here to help you bloom with confidence in your henna artistry!


